1944 U.S. Navy Confidential Nautical Chart of Pearl Harbor, with post-Attack modifications.
North Pacific Coast Hawaiian Islands South Coast of Oahu Pearl Harbor [Confidential].
On Hold
Description
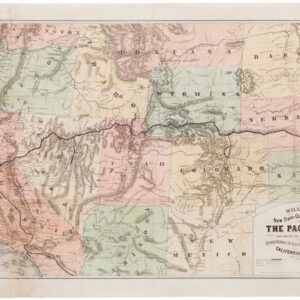
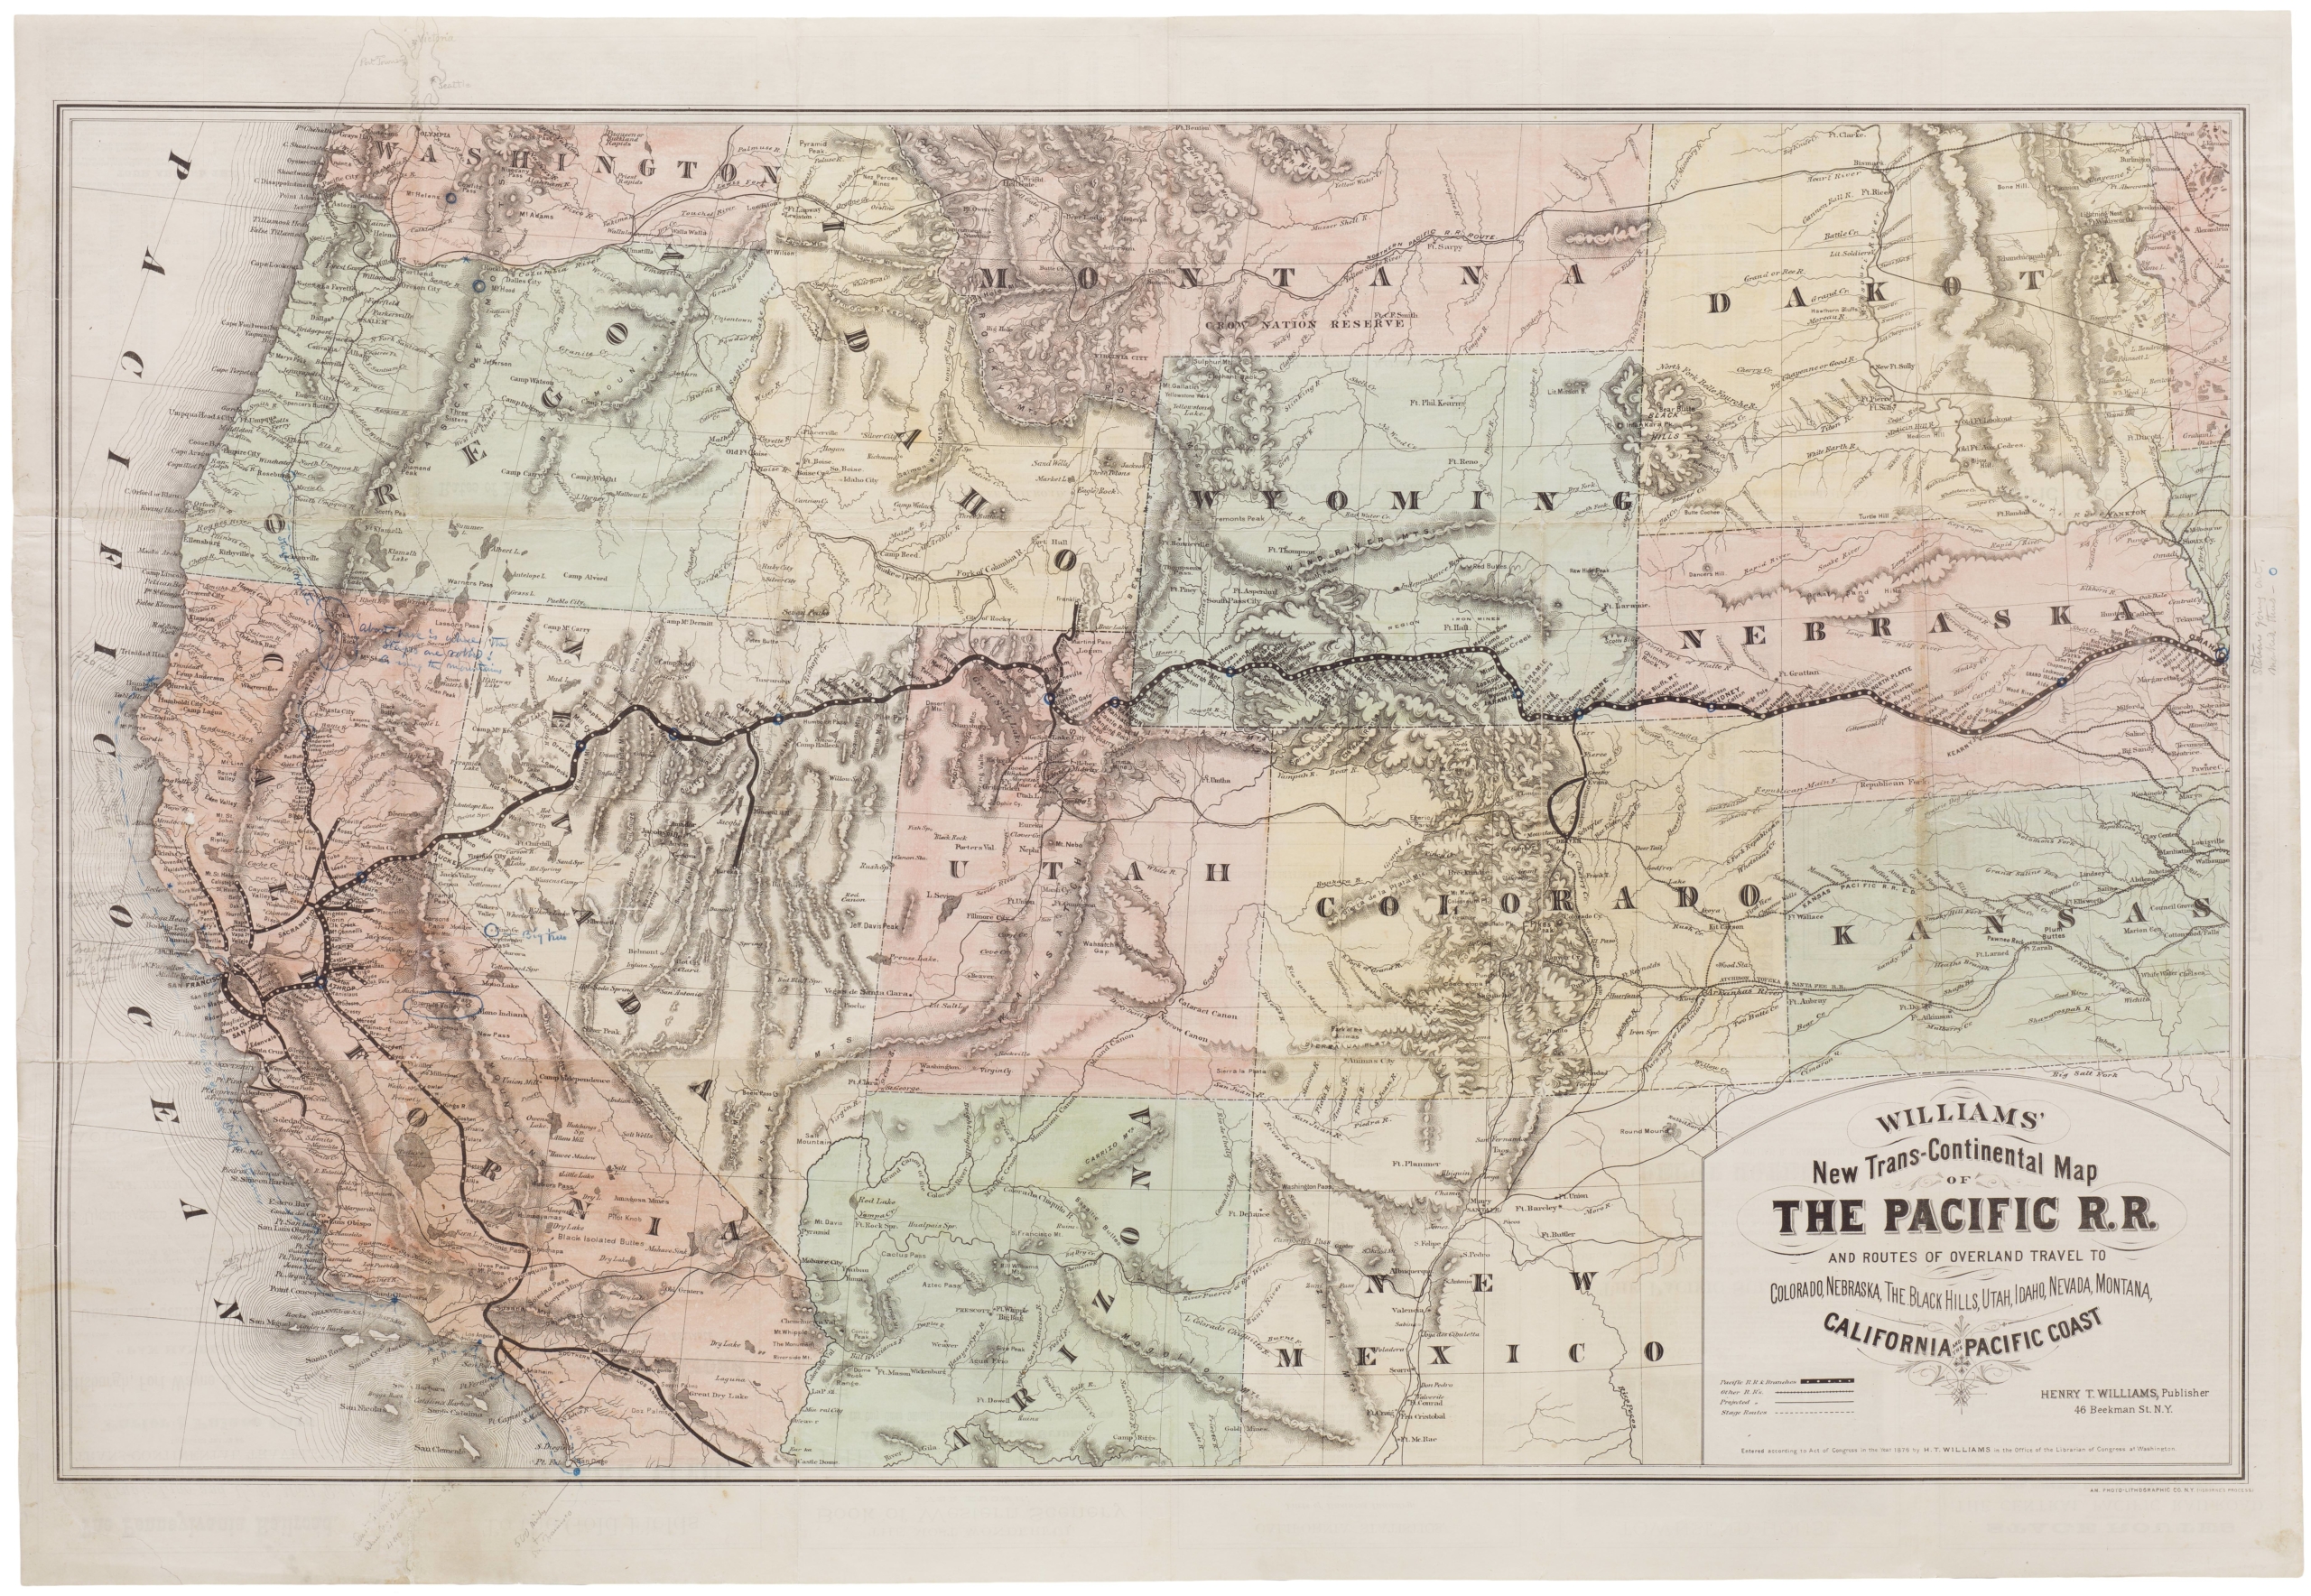
This is an unrecorded large-format 1944 confidential U.S. Navy Hydrographic Office nautical chart of Pearl Harbor, Oahu. Produced in the wake of the Japanese attack of 1941, it reflects the state of Pearl Harbor during the war, when it functioned as America’s main staging ground for operations in the Pacific Theater.
The chart covers Pearl Harbor and its approaches west of Honolulu, with white and blue shading used to denote shallow vs. deep waters, with the latter largely being dredged for the passage of naval warships. Soundings, lights, buoys, and shoals are marked throughout. Bottoms are abbreviated and explained at left below the title. On land, roads, rail lines, fortifications, docks, rice fields, and other military facilities are labeled, including Hickham Field (now Joint Base Pearl Harbor Hickam). Two compass roses with magnetic variations and a tidal chart provide additional navigational information.
Ford Island, located near center, was the target of Japanese attacks on December 7, 1941, and specifically the Mooring Platforms on the island’s east side was known as ‘Battleship Row.’ Five ships were sunk here during the attack – the Arizona, Oklahoma, California, West Virginia, and Nevada. The latter three were repaired and returned to service during the war, but the Arizona was destroyed when a bomb hit its ammunition magazine, causing a massive explosion that killed more than a thousand crew members. The Oklahoma was badly damaged and had capsized during the attack; it was salvaged in 1943 but too damaged to return to service, instead being stripped of usable materials.
Pearl Harbor after the Attack
In the immediate wake of the December 7, 1941, attack, Pearl Harbor underwent a frantic transformation from a scene of devastation into a massive, 24-hour industrial repair hub. While the shock of the raid lingered, the U.S. Navy launched one of the most significant salvage operations in history. Divers and engineers worked tirelessly in the oil-slicked waters to raise ships that many thought were lost forever. Remarkably, of the 19 ships sunk or damaged, all but three—the USS Arizona, USS Utah, and USS Oklahoma—were eventually repaired and returned to service. This period was also defined by a state of extreme high alert; Hawaii was placed under martial law, and the harbor’s defenses were rapidly bolstered with anti-aircraft batteries and coastal fortifications in anticipation of a follow-up invasion that never came.
By early 1942, Pearl Harbor had evolved into the primary staging ground for the entire Pacific Theater. The harbor’s role shifted from a vulnerable target to the ‘Gibraltar of the Pacific,’ serving as the nerve center for intelligence and logistics. It was during these months that Station HYPO, the clandestine signals intelligence unit at Pearl Harbor, began making critical breakthroughs in cracking the Japanese naval code, JN-25. This intelligence work, combined with the rapid turnaround of damaged vessels in the Pearl Harbor dry docks, provided the strategic edge necessary for the U.S. victory at the Battle of Midway in June 1942. The resilience shown in these months effectively turned a tactical defeat into the logistical foundation for the eventual Allied advance across the Pacific.
Publication information and census
This chart was originally prepared from surveys undertaken in 1897 and published by the U.S. Navy Hydrographic Office in 1899. It was updated repeatedly afterward, with the present map being the 18th edition, printed in 1944. Scattered manuscript annotations provide additional corrections to 1945, and some of the printed material near Battleship Row has been scratched out, perhaps due to the salvaging of previously sunken ships.
We have been unable to find any examples of this chart in institutional collections or on the market.
Cartographer(s):
Condition Description
Good. Some wear and toning along fold lines, wrinkling at top and bottom near edge. Toning along left edge.
References